Maximilian LIM JAKE YAng
Architecture Degree Works
Project 3: A maximum 90 seconds Animation of the completed 3D Scene
The development of the animation starts of by applying a target camera on my 1st scene. A line shape is then created that acts as a path for the camera. "Path constrain" is applied to both the camera and the target camera onto the path in the assign controller tab. Path is added in the path parameter tab. Follow, loop and constant velocity options for the camera and target are checked. The speed of the camera and target a adjusted in the time configuration tab.
The time output in rendering setup is swtiched to active time segment to render more than one frames. The file is saved to a location as an avi. video file. Quality of the renders are set to medium.
 |  |  |
|---|---|---|
 |  |  |
 |  |  |
The same methods are applied consistently on other scenes. As for exterior scenes, a curved line is created instead of a straight long one.
 |  |  |
|---|---|---|
 |
ADDING A CURTAIN
A cylinder is created as the curtain hanger. A plane shape is also created to act as a curtain. Cloth properties are added onto the plane through the modifier list. Cotton cloth properties are also applied onto the plane through the object properties of the plane. Next, few chosen points on the plane are then connected to the cylinder to produce a more realistic curtain effect. These connected points are made into a group. Turbosmooth is added to the curtain to make it look more realistic.
 |  |  |
|---|---|---|
 |  |  |
 |  |
ADDING FORCES
Gravity and wind forces are added to add movement for the curtain. The strength of both forces are adjusted. After that, a simulation of the curtain's movement is played to test its properties. Once satisfied with the movement of the curtain, materials are applied to the curtain and its hanger. Collision object is added onto the connection of the curtain and its hanger to create a realistic curtain. Curtain movements are again tested through a simulation.
 |  |  |
|---|---|---|
 |  |  |
 |  |  |
 |
ADDING RAINFALL
To add rainfall, particle systems are added. Birth, position, speed, shape and display of the particles are set in the particle view window. Particles movement move according to the wind and gravity forces. Scale of the particles are also adjusted to make it look like rain. A night scene is also created using the particle systems.
 |  |  |
|---|---|---|
 |  |  |
 |  |
EDITING ANIMATION ON ADOBE PERMIERE PRO
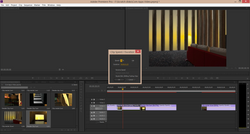
After rendering every clip, the clips are compiled together and edited using Adobe Premiere Pro video editing software. The style of the animation is expected to be a 50s style film. The speed duration of the clips are slowed down to fit the expectations of the film. Frames are arranged in the correct sequence. A title and descriptions are added to the video. Suitable music is added to the animation according to the style of my film. Rain and thunder sound effects are also added.
 |  |  |
|---|---|---|
 |  |
CREATING AN OLD FILM EFFECT IN ADOBE AFTER EFFECTS
After compiling according to sequence of the video, an old film effect is added to the animation. To do this, the animation is furthur edited in Adobe After Effects. First, scratches and fractal noise are added to create the effect. These create the effect of an old projector projecting a clip. Noise and brightness are adjusted. After that, the 'mode' of this layer is then switched to 'add' so that the effect is added. A 2nd layer of noise is also added to enhance the effect.
To furthur enhance the old projector style, an eclipse shape is applied on the video. It is subtracted so that the video is shown within the shape. Furthurmore, the opacity and feather of the subtracted eclipse shape is reduced. This emphasizes the light shown towards the center of the animation.
 |  |  |
|---|---|---|
 |  |  |
 |  |  |
 |  |  |
 |
BELOW IS MY ATTACHED ANIMATION